Physical Address
304 North Cardinal St.
Dorchester Center, MA 02124
Physical Address
304 North Cardinal St.
Dorchester Center, MA 02124


If you’re wondering how to use Webnode, you’re in the right place. Webnode is a popular website builder that allows users to create stunning websites without any coding knowledge. Whether you’re launching a personal blog, a business website, or an online store, Webnode offers an easy-to-use platform to bring your ideas to life. In this guide, we’ll walk you through the essential steps to get started, from setting up your site to customizing it for the best user experience. By the end of this post, you’ll have a solid understanding of how to make the most out of Webnode’s features and tools.
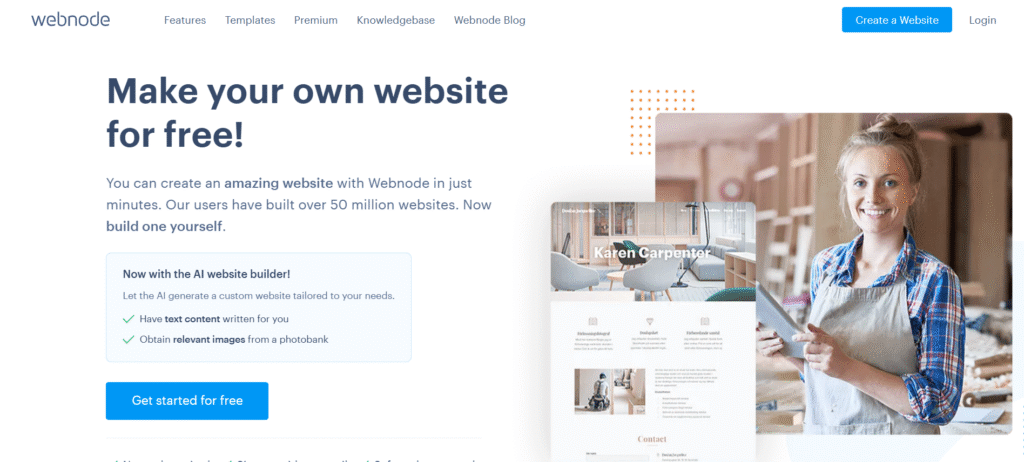
Webnode is a beginner-friendly website builder that allows anyone regardless of technical skills mto create professional-looking websites in just a few clicks. Launched in 2008, it has grown into a popular choice for individuals, small businesses, and freelancers who want to get online quickly without hiring a developer or learning how to code.
Unlike more complex platforms like WordPress or Joomla, Webnode is fully hosted and includes everything you need in one place: templates, content management tools, and hosting. That means you don’t have to worry about buying hosting separately or managing updates or security patches.
Webnode is ideal for:
While Webnode isn’t as feature-heavy as Wix or Squarespace, it wins points for simplicity and speed. You can go from idea to published website in under an hour. Plus, its multilingual support is something many other builders charge extra for or make complicated to set up.
Starting your website with Webnode is a fast, no-fuss process mperfect for beginners or anyone who wants to get online without the usual headaches of traditional web development. Here’s a step-by-step guide to get you up and running.
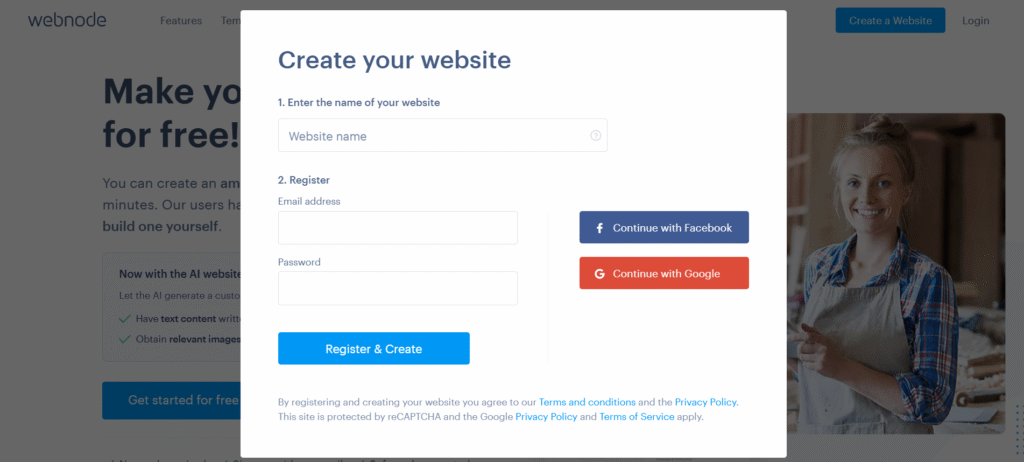
Head to Webnode.com and click the “Create a Website” button. You’ll be prompted to:
You’ll be instantly taken to the template selection screen no credit card required to start.
💡 Pro Tip: Use an email address you check often. Webnode sends important updates and helpful tips as you build your site.
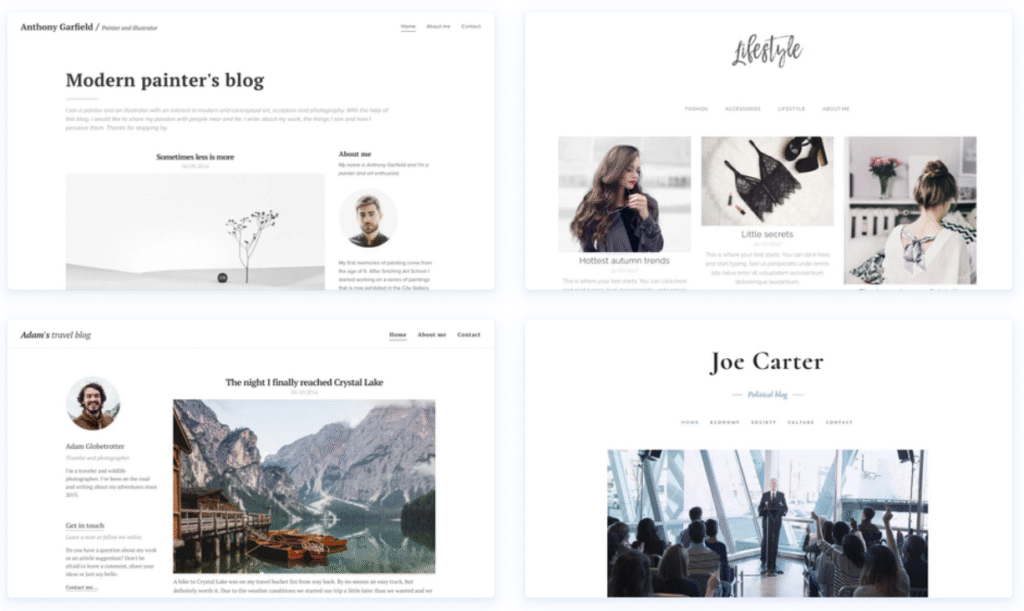
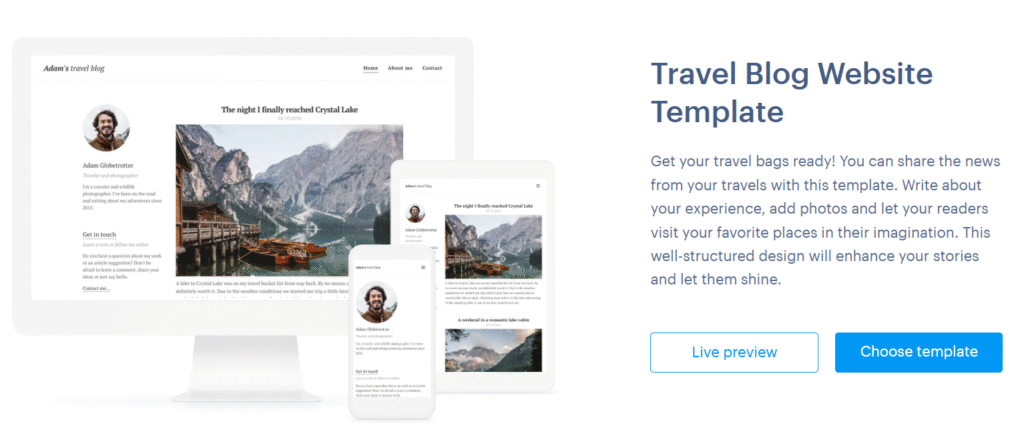
Webnode offers a variety of professionally designed templates sorted by industry business, portfolio, personal blog, online store, and more. Each template is:
Preview templates before committing, and pick the one that aligns best with your goals. For example:
💡 Don’t overthink it. You can always switch templates or customize the layout later.
Once you select a template, you’re taken to the Webnode editor. This is where all the magic happens. Here’s what you’ll see:
Everything updates in real time, so what you see is what your visitors will get.
💡 Explore first, edit second. Spend 5–10 minutes clicking around the editor to get familiar before making major changes.
Before diving deep into customization, focus on getting the essentials in place:
Getting these elements in early helps create a solid foundation for your site.
Webnode automatically saves your progress, but it’s smart to manually click “Save” before previewing or exiting. Use the Preview button to see how your site looks on desktop, tablet, and mobile.
Webnode is designed to remove the friction from building a website. You don’t need to learn code or deal with hosting you just sign up, choose a design, and start editing. By following the simple steps above, you can go from zero to a fully functional website in under an hour.
Whether you’re creating a personal blog, launching a portfolio, or building a site for your small business, Webnode provides the tools to make it easy and enjoyable.
Once you’ve chosen your template and set up the basics, it’s time to make your Webnode website truly yours. Customizing your site is where you bring your brand, personality, and message to life. And the best part? You don’t need any design or coding experience.
Here’s how to effectively customize your Webnode site, step by step.
Click directly on any text block to begin editing. You can:
💡 Tip: Keep your language clear and focused on your audience. Use short paragraphs and call-to-actions like “Contact Us” or “Get a Quote.”
Images shape your website’s first impression. Webnode templates come with stock images, but replacing them with your own builds trust and credibility.
To change an image:
You can also add galleries, background images, and banners.
💡 Tip: Use high-resolution images under 1MB to keep your site fast while looking professional.
Want to add a testimonial area, pricing table, or newsletter signup? You can do this easily using Webnode’s content blocks.
To add a new section:
Each block can be styled to match your brand colors and font choices.
💡 Tip: Use white space wisely to avoid visual clutter and improve readability.
Webnode allows you to change global styles (fonts, colors, buttons) to stay on-brand.
To customize:
Consistent use of brand colors and typography makes your site look more polished and trustworthy.
Your site’s menu should be simple and intuitive. To manage it:
You can also create drop-down menus for organizing content more efficiently.
💡 Tip: Keep your main navigation to 5–7 items max for better user experience.
Webnode includes built-in widgets that help you connect with your audience:
These tools make it easy for visitors to get in touch and engage with your brand.
Customizing your Webnode website is more than just changing colors it’s about creating a seamless experience for your visitors that reflects who you are and what you offer. With Webnode’s drag-and-drop editor and flexible content blocks, you can create a site that’s both functional and visually appealing, all without writing a single line of code.
Take your time, preview often, and build something you’re proud to share.
Blogging is a powerful way to share your expertise, improve SEO, and connect with your audience. Fortunately, Webnode includes built-in blogging tools that make it easy to create and manage a blog even if you’ve never done it before.
Here’s how to start blogging with Webnode, plus tips to make your posts stand out.
To start blogging on Webnode:
Webnode will automatically generate a blog page with a layout designed for showcasing multiple articles.
💡 Tip: Rename the blog page to something meaningful like “Insights,” “News,” or “Resources” depending on your niche.
Once your blog section is added, you can create your first post:
Each post includes fields for a featured image and short preview text both help attract clicks on your blog homepage.
💡 Tip: Break up long content with headers (H2, H3), bullet points, and media to make it easier to read.
Webnode’s editor lets you:
There’s also a “Preview” button, so you can see how your article will look before publishing.
💡 Pro Tip: Use the “excerpt” section wisely it acts like a blog post meta description and can improve click-through rates from the blog index.
You can group your blog content into categories (e.g., Tips, Tutorials, News) to help readers find related posts.
To add or manage categories:
This feature is especially helpful if you plan to blog regularly or cover different topics within your niche.
Webnode doesn’t have built-in post sharing buttons, but you can manually:
💡 Tip: The more consistently you promote your blog, the more traffic you’ll generate especially when combined with SEO (covered in the next section).
While Webnode is great for simple blogs, it does have a few limitations:
That said, if your goal is to educate, share updates, or support your main website content, Webnode is more than capable.
Webnode makes blogging easy for beginners and small business owners who want to share content without learning WordPress or dealing with technical setups. While it’s not built for high-volume content creators, it’s a solid platform for publishing helpful, clean, and search-friendly blog posts.
If you’re looking to build authority, drive organic traffic, and keep your website fresh with new content, blogging with Webnode is a smart and simple way to do it.
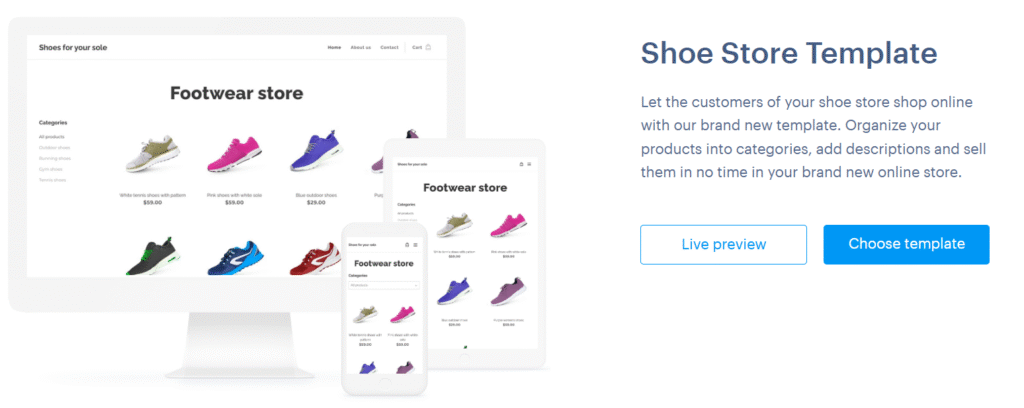
If you want to start selling products or services online, Webnode makes it surprisingly simple. Their built-in e-commerce tools are perfect for small businesses, hobby sellers, and anyone looking to launch an online store without the complexity of platforms like Shopify or WooCommerce.
Here’s how to set up your Webnode online store step by step.
To enable e-commerce on your Webnode site:
Webnode will automatically add product, category, and cart pages to your site. These pages are fully editable and mobile-friendly right out of the box.
💡 Note: You’ll need a Webnode Standard or Profi plan to unlock full e-commerce functionality.
Once your store is created, you can begin adding products:
You can also create product categories (e.g., “Clothing,” “Accessories,” “Sale”) to organize your store and help users find what they’re looking for.
💡 Tip: Use high-quality product images and clear, benefit-focused descriptions to boost conversions.
Webnode integrates with several payment gateways, allowing you to accept online payments easily. Supported options include:
To set up payments:
💡 Pro Tip: Offering multiple payment options can reduce cart abandonment and increase trust.
Shipping settings are customizable by region, price, or weight. You can:
Go to Store Settings > Shipping Methods to get started.
💡 Tip: Be transparent about delivery times and costs to avoid unhappy customers.
You can fully customize the look and layout of your product and category pages:
Also, don’t forget to add essential pages like:
💡 Bonus: Add a newsletter signup to capture emails from interested shoppers and market to them later.
Before going live:
Webnode allows you to preview the full purchase flow so you can fix issues before your first customer arrives.
Webnode’s built-in dashboard makes it easy to:
You’ll get email notifications for each sale, and you can manage everything from your Webnode account.
Webnode’s e-commerce features are ideal for small online stores that want a clean, user-friendly setup without technical overhead. While it doesn’t offer advanced features like abandoned cart recovery or third-party app integrations, it covers all the essentials to help you start selling fast.
If you’re looking for a straightforward way to launch an online store alongside your main website or blog, Webnode is a solid choice especially for solopreneurs, makers, and local businesses.
If you want your Webnode website to rank on Google and attract organic traffic, optimizing it for search engines is essential. Webnode offers user-friendly SEO tools that cover most of the basics, even for non-technical users.
Here’s how to properly configure your SEO settings and improve your chances of ranking higher in search results.
Every page on your Webnode site should have a unique, keyword-optimized title and meta description.
How to do it:
💡 Tip: Include your main keyword (e.g., how to use Webnode) near the beginning of both the title and description for better relevance.
Webnode automatically generates URLs based on your page name, but you can edit them for SEO.
Best practices:
yourdomain.com/about-us)💡 Tip: Match your URL with the page’s main keyword whenever possible.
Proper use of headings improves readability and helps search engines understand your content structure.
Here’s how:
💡 Tip: Naturally include keywords in your headings without stuffing. For example, use “How to Use Webnode Effectively” instead of just “Webnode.”
Search engines can’t “see” images, so they rely on alt text to understand them. Alt text also improves accessibility.
To add alt text:
💡 Tip: Include relevant keywords when appropriate, but don’t force them in.
Security is a Google ranking factor. Fortunately, Webnode automatically provides a free SSL certificate for all domains, which means your site will load with https://.
💡 Tip: Always double-check that your SSL is active, especially after connecting a custom domain.
Organize your website in a way that’s easy to navigate for both users and search engines.
Best practices:
💡 Bonus: Internal linking keeps users on your site longer and helps search engines crawl all your content.
To get indexed faster:
https://yourdomain.com/sitemap.xml💡 Tip: After major updates or publishing new content, you can request indexing directly through Search Console.
Fresh, keyword-rich blog content can significantly improve your search visibility.
💡 Pro Tip: Use tools like Google Keyword Planner, Ubersuggest, or Ahrefs to find relevant keywords for your blog.
Webnode provides a solid set of SEO tools that make it easy for beginners to improve their site’s search engine visibility. While it lacks advanced features like schema markup or automated SEO audits, it covers all the core essentials needed to rank well especially for small businesses, bloggers, and freelancers.
Invest a bit of time in optimizing each page, and your efforts will pay off with better traffic, visibility, and growth.
Using a custom domain (like www.yourbusiness.com) makes your website look more professional, trustworthy, and memorable. Webnode makes the process of connecting a domain relatively easy even if you’re not tech-savvy.
Here’s a step-by-step guide to help you connect a custom domain to your Webnode website.
Custom domain connection is only available with Webnode’s premium plans specifically Mini, Standard, Profi, or Business.
If you’re still on the free plan:
💡 Tip: Webnode offers a free domain for the first year with most annual premium plans.
You have two options:
If purchasing through Webnode:
💡 Tip: Stick to .com or your local country code for a more trusted look.
If you already have a domain from a third-party provider, you can still use it with Webnode.
Steps:
Webnode typically requires you to set:
217.16.8.185www pointing to webnode.comOnce DNS settings are updated, it can take up to 48 hours for changes to propagate globally.
💡 Pro Tip: If you’re unsure about DNS settings, reach out to your registrar’s support they can usually help you make the changes quickly.
If you’ve added multiple domains to your site, be sure to set your custom domain as the primary one.
To do this:
This ensures all traffic redirects to your branded domain rather than the free Webnode URL.
Security is critical for both SEO and user trust. Thankfully, Webnode automatically provides a free SSL certificate for every connected domain.
Check that:
https://If not, go to Project Settings > Domain > HTTPS and ensure it’s enabled.
💡 Bonus: Having HTTPS improves your chances of ranking higher on Google.
Connecting a custom domain to Webnode is a straightforward process that significantly improves your website’s credibility and branding. Whether you buy a new domain or bring your own, the platform walks you through each step with minimal technical setup.
If you want your site to be taken seriously by both visitors and search engines a custom domain is non-negotiable. It’s one of the smartest upgrades you can make early in your website journey.

Once your Webnode website is designed and customized, the next step is making it live and keeping it updated over time. Publishing your site is quick, but effective website management is what keeps it running smoothly and growing with your goals.
This guide will walk you through both publishing and long-term management with clarity and confidence.
Publishing your Webnode site is as easy as clicking a button but make sure everything is in place first:
Before you publish, check:
To publish:
💡 Tip: Preview your site before publishing to catch layout issues or typos.
Your content will evolve. Webnode makes it simple to update text, images, sections, and layouts even after the site is live.
To make changes:
What you can edit anytime:
💡 Tip: Even small updates like posting a new blog or changing your homepage banner help keep your site fresh good for both users and search engines.
Your website’s structure matters for both user experience and SEO. Webnode lets you easily add, delete, or rearrange pages:
💡 Tip: Use short, descriptive page names that clearly reflect the content (e.g., “Pricing” instead of “Our Plans”).
Webnode includes basic visitor statistics with most premium plans, such as:
For more detailed analytics, connect your site to Google Analytics:
💡 Bonus: Use Google Search Console to monitor how your site performs in search and uncover opportunities to improve SEO.
While Webnode does not offer manual backup downloads, it does provide automatic backups and allows you to restore your site to a previous version.
To restore:
💡 Important: Not all plans include backup functionality check if your plan supports this before making risky edits.
Keep your subscription and domain renewed to avoid downtime.
💡 Tip: Consider upgrading to a higher plan if you outgrow your current features (e.g., need more pages, email accounts, or e-commerce options).
Publishing your Webnode site is just the beginning. The real value comes from maintaining and improving it over time. Whether you’re blogging, running a business site, or managing a store, regular updates and smart organization keep your site relevant, secure, and successful.
Take full advantage of Webnode’s user-friendly dashboard and built-in tools and your website will continue to grow alongside your goals.
Webnode is a popular website builder that offers a simple solution for creating professional websites without the need for coding knowledge. However, like any platform, it has its strengths and weaknesses. Let’s break down the pros and cons to help you determine if Webnode is the right choice for your website.
Webnode’s drag-and-drop editor is designed with beginners in mind. You don’t need technical skills to build a visually appealing site. Everything from page creation to content editing is intuitive, making it easy for anyone to get started.
Why it matters: Whether you’re a small business owner, blogger, or entrepreneur, a simple setup saves you time and effort.
Webnode offers a variety of stylish, mobile-responsive templates that adjust seamlessly to different screen sizes. Your website will look great on desktop, tablet, and mobile devices without additional configuration.
Why it matters: Mobile responsiveness is crucial for user experience and SEO, as Google favors mobile-friendly websites.
Compared to other website builders, Webnode offers competitive pricing, with plans that are more affordable than many alternatives. You can also get a free version with Webnode’s basic tools, though it lacks features like a custom domain.
Why it matters: Webnode is an excellent choice for those on a budget, offering great value at various pricing tiers.
Webnode supports the creation of multilingual websites, allowing you to reach a global audience. You can create separate pages for each language and seamlessly switch between them.
Why it matters: If your business or blog caters to multiple regions or countries, multilingual functionality opens doors to a broader audience.
Webnode provides essential SEO features, such as custom meta descriptions, title tags, image alt text, and clean URL structures. This makes it easier to optimize your website for search engines and improve your chances of ranking higher on Google.
Why it matters: Effective SEO increases your website’s visibility, driving more organic traffic over time.
While Webnode offers a variety of templates, customization options are limited compared to other website builders like Wix or WordPress. Advanced users might find the lack of flexibility in design options restrictive.
Why it matters: If you’re looking for total creative freedom and deep design control, Webnode may not be the best fit for you.
Although Webnode has e-commerce capabilities, it’s not as robust as other platforms like Shopify or WooCommerce. The free and lower-tier plans are also limited in terms of e-commerce features (such as inventory management and payment options).
Why it matters: If you plan to run a larger online store with complex product listings, Webnode may not meet all of your needs.
Webnode allows you to create a blog, but it lacks features for monetizing your content, such as integrating with ad networks like Google AdSense or adding affiliate links in a structured way.
Why it matters: If blogging is your primary income source, you may need additional tools or workarounds to monetize effectively.
Unlike other website builders like Wix, Webnode doesn’t have an app marketplace where you can easily add third-party apps or integrations (e.g., email marketing or advanced analytics). This limits the ability to expand your website’s functionality.
Why it matters: For users who require a variety of integrations, Webnode’s lack of an app store may be a significant downside.
Some users have reported slower response times from Webnode’s customer support, particularly for free plan users. While their support team is helpful, response times can be longer compared to other platforms with more dedicated support.
Why it matters: If you run into issues with your website, you might experience delays in getting support especially on the free or lower-tier plans.
Webnode is an excellent choice for users who need a simple, affordable website builder that’s easy to use and offers core features like multilingual support and SEO tools. However, it’s not the best option for those looking for complete design freedom, complex e-commerce functionalities, or a large app marketplace.
Ultimately, Webnode is ideal for small business owners, bloggers, or those creating a personal website who want a quick, cost-effective solution without getting bogged down in technicalities.

When it comes to using Webnode, you might have a few questions before diving into building and managing your website. Here are some of the most common inquiries from users, along with clear and concise answers to help you get started.
Yes, Webnode offers a free plan that allows you to create a website with a Webnode-branded domain (e.g., yourwebsite.webnode.com). However, this plan comes with limitations, such as the inability to connect a custom domain, fewer templates, and restricted features.
If you want more features, including a custom domain, additional storage, and e-commerce capabilities, you’ll need to upgrade to a premium plan.
Yes, you can connect your own custom domain to your Webnode website, but you’ll need to be on a premium plan. If you already own a domain from another provider, you can link it to Webnode by updating the domain’s DNS settings to point to Webnode’s servers.
If you don’t have a domain, you can also register one directly through Webnode.
Yes, Webnode offers e-commerce functionality, allowing you to create an online store. You can add products, set prices, manage orders, and accept payments through secure payment gateways.
However, keep in mind that Webnode’s e-commerce features are more basic compared to specialized platforms like Shopify, so it’s ideal for small to medium-sized stores.
Webnode is versatile and can be used to create various types of websites, including:
Webnode offers templates suited for different needs, and its drag-and-drop editor allows for easy customization to suit your goals.
Webnode offers several built-in SEO tools to help you improve your website’s visibility in search engines:
To get the best results, make sure to optimize your content, use relevant keywords, and regularly update your website with fresh content.
Switching to Webnode is relatively simple, but it depends on the platform you’re migrating from. If you’re moving from another website builder or WordPress, you can manually export and import content, but there’s no direct migration tool from Webnode.
It’s best to rebuild your site on Webnode by copying over text, images, and other assets from your old website.
Webnode takes security seriously and provides a free SSL certificate for all websites on premium plans. This ensures that your website has HTTPS encryption, which secures data between the user’s browser and the server.
While Webnode’s platform is secure, it’s always a good idea to keep your website updated and use strong passwords for your account to minimize risks.
Yes, Webnode provides basic statistics such as page views, visitors, and the most popular pages. For more detailed insights, you can integrate Google Analytics to track traffic, user behavior, and more.
Webnode allows you to add ad spaces, affiliate links, and other forms of monetization. However, it doesn’t have built-in tools for integrating with ad networks like Google AdSense. If you’re a blogger or content creator looking to monetize, you’ll need to set this up manually or through third-party services.
Webnode offers several ways to get support:
While support is generally good, response times may vary depending on your plan and the nature of your query.
These are just a few of the most commonly asked questions about Webnode. Whether you’re just getting started or looking to optimize your website, Webnode’s easy-to-use platform, combined with its helpful support options, makes it a great choice for building a professional website.
If you have more questions or need further assistance, Webnode’s help center and community forum are excellent resources to dive deeper.
Webnode is a powerful, user-friendly website builder that caters to a wide range of users, from small business owners to bloggers and entrepreneurs. Its intuitive drag-and-drop interface, responsive templates, and affordable pricing make it a great choice for those looking to create a professional website quickly and easily.
Whether you’re building a personal blog, a business website, or an online store, Webnode provides all the essential tools you need to get started. Its multilingual capabilities, SEO features, and e-commerce options further enhance its appeal, especially for global audiences and businesses looking to expand.
However, like any platform, Webnode has its limitations. Its design customization options are more basic compared to other website builders, and while its e-commerce features are solid for small stores, they may not meet the needs of larger, more complex online shops. Additionally, Webnode’s customer support, while helpful, can be slower for free-tier users.