Physical Address
304 North Cardinal St.
Dorchester Center, MA 02124
Physical Address
304 North Cardinal St.
Dorchester Center, MA 02124

If you’re wondering how to build a website with HostPapa, you’ve come to the right place! Creating your own website may seem like a daunting task, but with HostPapa’s user-friendly tools and hosting plans, it’s easier than you think. In this guide, we’ll walk you through each step from choosing the right hosting plan to publishing your site and making it live. Whether you’re building a personal blog or a business website, this step-by-step approach will help you get your site up and running quickly.
In this guide, you’ll learn how to create a website in 5 minutes for free even if you have zero technical skills. We walk you through every step, from choosing a free website builder and setting up your account, to customizing your design, adding essential pages, and hitting publish. Whether you’re launching a personal portfolio, blog, or small business site, this post will help you get online quickly and easily without spending a dime.
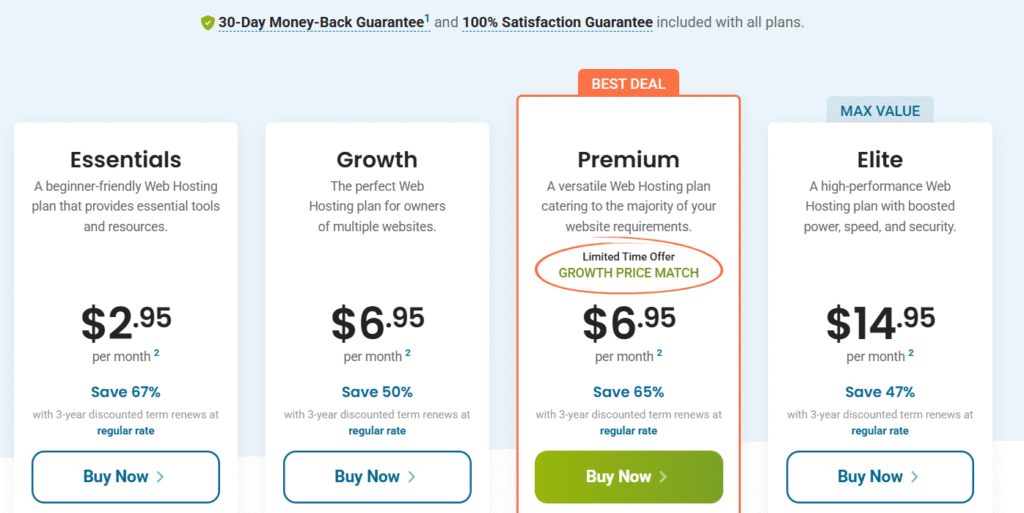
Before you start building your website, the first decision you need to make is choosing the right hosting plan from HostPapa. The hosting plan you select will determine your website’s speed, reliability, and future scalability. HostPapa offers several options, but not every plan is ideal for every user so here’s how to choose the best one for your needs.
Start by thinking about what kind of website you’re building:
If you’re unsure, it’s smart to start with the Business shared hosting plan. It gives you room to grow without overpaying upfront. As your traffic increases or your needs change, HostPapa makes it easy to upgrade to a more powerful plan without losing your site data.

Your domain name is your website’s address on the internet it’s how people will find you online. Choosing the right domain is one of the most important steps in building a website with HostPapa. Fortunately, HostPapa makes the process simple by allowing you to register a domain during the hosting sign-up process.
Think of your domain name as your brand’s first impression. It should be:
For example, if you’re building a website for a local bakery, something like www.SweetCityBakery.com is far better than www.sweet-city123.com.
When you sign up for a hosting plan, HostPapa offers a free domain name registration for the first year. Here’s how to do it:
.net, .co, or .shop if .com is unavailable.No problem. If you’ve registered a domain elsewhere (like GoDaddy or Namecheap), you can easily point it to HostPapa by updating the domain’s nameservers. HostPapa provides detailed support guides for this, and their team can help walk you through the process.
Registering your domain name is a small step with a big impact. Take your time to pick a name that reflects your goals and remember, a great domain makes your website more trustworthy and easier to find.

Once you’ve selected a hosting plan and registered your domain, the next step is to set up your HostPapa hosting account. This process is straightforward, but getting it right from the beginning ensures your website runs smoothly and is secure from day one.
After choosing your hosting plan:
Once you’ve completed your purchase, HostPapa will send a welcome email with:
Be sure to save this email. It contains important links and credentials you’ll use regularly.
You can now access your HostPapa Client Area (the main dashboard). Here’s what you can do from there:
HostPapa uses cPanel, a widely used and beginner-friendly control panel. Through cPanel, you can:
Don’t worry if cPanel looks overwhelming at first many features are automated, and HostPapa offers tooltips and help articles right inside the interface.
As part of your initial setup, make sure you:
Security and stability are easier to manage from the start than to fix later after something breaks.
Your HostPapa Client Area is the gateway to everything from installing your site to contacting support. Bookmark it in your browser so you can access it quickly whenever you need it.
Getting your hosting account set up properly is like laying a solid foundation before building a house. Take the time to familiarize yourself with your tools, and you’ll have a much easier time building and managing your website.

Now that your HostPapa hosting account is ready, it’s time to install the software that will power your website. You have two main options: use a website builder or install a content management system (CMS) like WordPress.
Each option has its advantages, and the best choice depends on your comfort level and the type of website you’re building.
If you’re a beginner or want to build a professional-looking site without touching any code, the HostPapa Website Builder is a great place to start.
Why choose the HostPapa Website Builder?
How to launch it:
This is ideal for portfolios, small business sites, landing pages, or any simple web presence that doesn’t need extensive functionality.
If you want more control over your site’s features, layout, and scalability, WordPress is the better option. It powers over 40% of all websites for good reason it’s flexible, customizable, and supported by a huge community.
Why choose WordPress?
Installing WordPress via Softaculous (1-click install):
| Feature | HostPapa Website Builder | WordPress |
|---|---|---|
| Skill Level Needed | Beginner-friendly | Beginner to Advanced |
| Design Flexibility | Moderate | High |
| Custom Features | Limited | Extensive (via plugins) |
| Blog or Content Management | Basic | Excellent |
| Scalability | Moderate | High |

Once you’ve installed your website builder or WordPress, the next big step is choosing a template (for the HostPapa Website Builder) or a theme (for WordPress). This is more than just picking something that “looks nice” your template sets the foundation for your site’s design, layout, and even user experience.
A well-designed template can:
In short: your design shouldn’t just look good it should work well for your audience and support your goals.
HostPapa offers a library of pre-designed templates across categories like business, portfolio, restaurant, e-commerce, and more.
How to choose and apply a template:
Tips for choosing a template:
WordPress gives you access to thousands of free and premium themes. Some are built for general use, while others are designed specifically for blogs, e-commerce, portfolios, or service-based businesses.
How to find and install a theme:
Popular beginner-friendly themes:
Pro tip: Stick to themes that are regularly updated, well-rated, and compatible with popular plugins. This ensures long-term support and fewer issues down the line.
Once you’ve selected your template or theme, it’s time to customize adjust the colors, fonts, layout, and images to reflect your brand or personal style. Don’t worry about perfection; focus on clarity, simplicity, and a smooth user experience.
Choosing the right template is like choosing the outfit your website will wear every day make sure it fits well, looks great, and feels right for your audience.
Ready to bring your site to life? Next, we’ll walk through how to customize your website with content, images, navigation, and more.
With your template or theme in place, it’s time to make your website truly yours. Customizing your site means adding your own text, images, branding, and layout choices transforming a generic design into a unique online presence that represents you or your business.
Don’t worry you don’t need to be a designer or coder. Both the HostPapa Website Builder and WordPress offer user-friendly tools that make customization simple.
Start by personalizing your site with your logo, color scheme, and typography.
Tip: Keep it simple and professional. Too many colors or font styles can overwhelm visitors.
Replace the placeholder content with your own:
Bonus Tip: Use real photos of your team, products, or services to build trust with visitors.
Your menu is how users move through your site, so keep it clean and intuitive.
Most users will visit your website on a phone or tablet, so it must look great and work well on all screen sizes.
Depending on your goals, you might want to include:
Both the HostPapa Website Builder and WordPress offer widgets or plugins for these features.
Once you’ve customized the layout and content, test your website thoroughly:
First impressions matter. A polished, professional-looking site builds trust immediately.
Customizing your website is where the magic happens. It’s not about perfection it’s about creating a site that feels authentic, serves your visitors well, and helps you reach your goals. Start small, improve over time, and don’t be afraid to experiment.
Next, we’ll cover Step 7: Add Essential Pages and Features the content and tools every website needs to be effective. Ready for that step?

Now that your website design is customized and ready, it’s time to fill it with the core content and features your visitors expect. Think of these pages as the pillars of your site without them, users may get confused, frustrated, or leave without taking action.
Whether you’re building a blog, a business site, or an online portfolio, these essential pages and features help establish trust, provide value, and guide users where you want them to go.
Your home page is often the first thing visitors see, so it should:
Think of it as your elevator pitch visitors should understand your value within seconds.
This page tells your story. Use it to explain:
People buy from people. A relatable About page can make a big difference in how users connect with your brand.
If you’re offering services or products, dedicate a page to them:
Keep it simple, skimmable, and benefit-focused.
A contact page should include:
Pro tip: Add this page to your site’s main navigation and footer people expect to find it quickly.
These are must-haves, especially if you:
You can use free generators or consult with a legal expert to create these pages. HostPapa also offers tools and guidance for adding basic legal pages.
Adding a blog is a great way to:
Even one or two quality blog posts a month can boost your visibility in search results over time.
You don’t need dozens of pages to have an effective website but the right pages, structured clearly and filled with helpful content, will build trust and drive results. Start with the essentials, then expand as your goals and audience grow.
Next, we’ll dive into Step 8: Optimize for SEO and Mobile, where you’ll learn how to make your site more discoverable on Google and friendly on all devices. Want to continue?

After months of planning, designing, and customizing, you’ve finally reached the point where your website is ready to go live. But before hitting the “Publish” button, it’s crucial to preview your website to make sure everything looks and functions the way you want it to. This final check ensures your visitors will have the best experience possible when they land on your site.
Here’s a step-by-step guide to help you preview and publish your website with confidence.
Take a moment to review your website before making it public. This is your chance to catch any last-minute issues, typos, or design inconsistencies.
How to Preview Your Website:
During the preview, pay attention to:
Sometimes, it’s easy to miss something after spending so much time on a site. Before publishing, consider getting feedback from a fresh set of eyes:
Their input can help identify any issues or improvements you might have overlooked.
Before you publish, ensure these key details are set:
Once you’ve previewed and made adjustments, it’s time to publish your site! Here’s how:
Publishing your site is just the beginning. Once it’s live, you need to tell people about it:
After publishing, don’t just forget about it. Regularly check the performance of your website:
Publishing your website is a significant milestone, but it’s not the end of the journey. Regularly updating, improving, and promoting your website will ensure it continues to serve both your business and your audience effectively.

Congratulations! You’ve successfully built your website with HostPapa, taking it from a simple idea to a fully functional online presence. But remember, launching your website is just the beginning. The real work starts now keeping your site updated, monitoring its performance, and making sure it serves your goals and audience effectively.
Here are a few final tips to help you continue improving and growing your website over time:
An outdated website can drive visitors away. To keep your audience engaged and improve your SEO, make sure to:
By keeping your site current, you’ll show visitors that you’re active and invested in providing value.
Building a website is one thing, but making sure people can find it is another. Search Engine Optimization (SEO) is crucial for improving your site’s visibility on search engines like Google.
SEO isn’t a one-time task it’s an ongoing effort. Stay committed to it, and you’ll see improvements over time.
A fast-loading website is essential for both user experience and SEO. If your site is slow to load, visitors will bounce, and your Google rankings will suffer.
Once your site is live, set up Google Analytics or another tracking tool to monitor your site’s performance. Regularly review your:
Use this data to refine your strategy and improve your site’s effectiveness.
The web is constantly evolving, and so should your website. Stay updated on trends in web design, user experience (UX), and digital marketing. Here are a few ways to keep learning:
If you encounter challenges down the road whether it’s technical issues, design improvements, or scaling your site don’t hesitate to ask for help. HostPapa’s customer support is available to assist you, and you can always consult with professionals in web design or digital marketing if you want to take your site to the next level.
Building a website is a rewarding experience that opens up countless possibilities, whether you’re launching a personal blog, a business, or an online store. With the right tools, planning, and ongoing effort, your website can become a powerful asset in reaching your audience and achieving your goals.
Now that you know the steps, it’s time to keep refining your site and making it even better. Stay consistent, stay engaged with your users, and always look for ways to improve.
Good luck with your website journey, and remember success comes from both building and continually improving your online presence. If you have any questions or need more guidance, feel free to reach out!